Recipes

Recipes blog posts

Slow cook Family Roast

Slow cook Family Roast

I wasn’t sure what to cook today. It’s a colder day and overcast with some poor weather in Sydney.

At Coles, I saw some short ribs, and then I saw what I assume is an eye fillet roll.

Slow cook roast beef in packaging

Ingredients

  • Slow cook family roast (1.5 kilograms of meat)
  • Carrots (diced)
  • Onions (chopped)
  • Celery (sliced)
  • Beef stock (1 Litre)
  • Cooking sherry (1 cup)
  • Mustard powder (2 teaspoons)
  • Worcestershire sauce (2 tablespoons)
  • Brussels sprouts (halved)
  • Horseradish cream
  • Broccolini
  • Baby green peas

Instructions

Meat instructions slow cook family roast

  1. Heat your oven to about 150 °C.
  2. Unwrap your meat from its tight plastic coating.
  3. Dry your meat with absorbent kitchen paper.
  4. Season your meat with lots of iodised salt and freshly ground black pepper.
  5. Prepare your carrots, onions, and celery and place them into the bottom of a large casserole.
  6. Place your seasoned meat onto the bed of carrots, onions, and celery.
  7. Pour in the litre of beef stock as well as the cooking sherry and Worcestershire sauce. 
  8. Add in the mustard powder.
  9. Place the lid on the casserole and put it into the oven for four hours.
  10. After four hours, remove the lid from the casserole and continue to cook for 45 minutes.
  11. Add the halved Brussels sprouts to the casserole around your meat and atop the hot fat rendering from your piece of meat.
  12. After 45 minutes, remove the casserole from the oven and rest your meat. Because your meat will be firm with heat, you want your meat to relax and loosen up for that perfect mouthfeel of fatty, juicy and moist meat on your tongue.
  13. Lift your meat from the casserole and place it into a shallow bowl and cover with aluminium foil for 15 minutes.
  14. Remove the Brussels sprouts and place them into another bowl.
  15. Once your meat has rested, dissect it along the muscle planes. Place the large muscle bundles into plastic containers for the refrigerator for future meals. 
  16. Place half of the Brussels sprouts into plastic containers, too, for future meals.
  17. Leave aside the fat cap, which has become crunchy on top during the final 45 minutes of cooking. You’ll notice the fat has rendered, and the remaining connective tissue has become crispy. The fat cap meat may be cooked well-done, but because of the amount of fat and the loose muscle fibre structure, this meat is not only tender but delicious.

Vegetable instructions

  1. Wash the broccolini and then saute in a skillet.
  2. Add the frozen baby green peas to the same skillet and some of the fatty meat liquid from the casserole and put a lid on the skillet for 3 minutes.

Plating up instructions for your slow cook family roast

  1. In a shallow bowl, spoon in the peas to act a comfy bed for your meat.
  2. Place your meat atop the peas.
  3. Place the broccolini next to the meat on one side of the bowl and the Brussels sprouts opposite.
  4. Add a large dollop of horseradish cream to your meat.

Final thoughts

  1. The taste was similar to a roast rump roast I did last year.
  2. What’s your favourite way of cooking large pieces of beef?
  3. What other vegetables do you enjoy with beef?
  4. Do you like horseradish cream?

Sous vide duck breast with lentils, broccolini, and potato mash

Sous vide duck breast with lentils, broccolini, and potato mash.

Sous vide duck breast with lentils, broccolini, and potato mash

I was invited to dinner tonight at a friend’s place. Unfortunately, her son has developed an infection, so we’ve rescheduled it to another time.

Fortunately, I had some duck breasts in the refrigerator and frozen potato mash, so the decision for dinner was easy.

Ingredients

  • Duck breast
  • Iodised salt
  • Black peppercorns
  • Potato mash (frozen, packet for microwave radiation)
  • Broccolini
  • Lentils (tinned)
  • Butter (salted)

Instructions

Sous vide duck breast.

  1. Season the duck breast with a liberal amount of iodised salt.
  2. Put the duck breast into a plastic bag and vacuum seal the bag.
  3. Heat a water bath to 55 °C and cook the duck breast for 1 hour.
  4. Remove the duck breast from the vacuum bag.
  5. Dry the duck breast with absorbent kitchen paper.
  6. Heat a cast-iron skillet and rub a little high vapour oil on the hot surface of the skillet.
  7. Score the skin of the duck and sear the skin until it reaches a pleasing colour. What is a pleasant shade, you may ask? As for me, I like a deep golden brown. Some people will go for lighter, and others will prefer darker.
  8. After searing the duck breast’s skin, set aside the duck breast and let it rest for about 10 minutes.
  9. With a freshly honed knife, slice the duck breast into slices a few millimetres thick (or thicker if you prefer your meat to be firm and thick).

Potato mash

  1. Follow the instructions on the packet.

Broccolini and lentils

  1. Trim the stalks of the broccolini with a paring knife.
  2. Empty the tin of lentils, rinse under cold water, and then drain with a sieve.
  3. Wash the broccolini under running water.
  4. After the duck breast has finished searing in the skillet, add a nudge of salted butter to the skillet and then add the broccolini and lentils.
  5. Cook the broccolini and lentils with a lid on the skillet. 
  6. Cook the broccolini to your preference.

Plating up

  1. Spoon the potato mash onto a warm dinner plate.
  2. Lay the slices of rested duck breast on the potato mash so the mash can absorb the meat juices, which will continue to ooze out of the meat. You don’t want to waste a drop of the tasty savoury juices.
  3. Place the broccolini next to the potato mash and then spoon the lentils next to the potato mash.
  4. Spoon the burnt butter by dribbling it over the duck breast, and it too will be soaked up by the potato mash.

Final thoughts

It’s always worth having something in the refrigerator in case of plans falling through.

I hope my friend’s son feels better soon.

Filet mignon and crunchy chickpea salad

Filet mignon and crunchy chickpea salad

Sous vide black pepper filet mignon
Ground black peppercorns Filet mignon and crunchy chickpea salad

It’s been a few weeks since I’ve cooked a steak. I picked up some eye filet steak this morning, thinking that I would cook it sous vide and have enough beef leftover for lunch meat during the week.

I wanted something crunchy like croutons for the salad, but rather than fried or toasted bread; I went with a crunchy chickpea salad. I got the idea from Bon Appétit.

Ingredients

  • Eye filet steak
  • Iodised salt
  • Black peppercorns
  • Chickpeas (tinned) for crunchy chickpeas
  • Olive oil
  • Lettuce
  • Fennel
  • Red onion
  • Cucumber
  • Cherry tomatoes
  • Cracker Barrell Maple-infused cheddar cheese with toffee bites

Instructions

Steak

  1. Unwrap the steaks and tie them with cooking string to create steak rounds. Tieing the meat isn’t necessary, but it keeps the muscle bundle together and helps when searing the steak at the end.
  2. Season the steak rounds with a liberal amount of iodised salt.
  3. Vacuum pack the steaks and refrigerate for a few hours to permit the salt to penetrate the muscle.
  4. Heat the water in the water bath to 55 °C and then cook the meat at that temperature for two hours.
  5. At the end of the cooking time, remove the steak from the plastic bag and pat it dry with kitchen paper.
  6. Grind some pepper and salt in a mortar with a pestle. Grind enough so you can make a thick coating of pepper on the steak.
  7. Heat a cast-iron skillet to smoking hot.
  8. Add some high vapour point oil to the skillet and allow the oil to spread across the hot surface.
  9. Sear the steak using tongs to ensure all surfaces form a nice crust.
  10. While searing the steak, add in some butter and spoon melted butter over the steak.
  11. Allow the steak to rest for about 10 minutes before slicing it open with a sharp knife.

Crunchy Chickpea Salad

  1. Heat some olive oil over low heat in a non-stick skillet.
  2. Toss in some drained and rinsed chickpeas and sautée until the chickpeas become crunchy.
  3. Allow the crunchy chickpeas to cool on kitchen paper which will absorb the excess oil.
  4. Cut the vegetables for the salad and the cheese, and put them into a salad bowl.
  5. Season with some salt.
  6. Add in a good glug of extra virgin olive oil.
  7. Add in the crunchy chickpeas, which are now like croutons and toss your salad. Do not look up “tossed salad” in the urban dictionary.

Plating up

  1. Plate the salad onto the dinner plate.
  2. Dissect the steak round by cutting it in half to create two semi-circles of meat.
  3. Slice one half into thin slices and lay them out on the plate.
  4. Spoon the burnt butter from the cast-iron skillet over the cut surface of the steak.

Final thoughts

This dish was a nice simple steak meal with a heap of good mouthfeel.

  • Do you like steak and salad?
  • Do you like crunchy chickpeas?

Penne pasta “mac and cheese” with pesto

Penne pasta “mac and cheese” with pesto

I was inspired to make this meal after watching the YouTube channel “Sous vide everything” which featured pork belly with mac and cheese.

Rather than using macaroni, I went with penne ziti pasta because that’s what I had in my pantry.

Penne pasta and cheesy white sauce after the oven

Ingredients for mac and cheese

  • Penne pasta
  • Water
  • Iodised salt
  • Salted butter
  • Plain flour
  • Milk
  • Swiss cheese
  • Pecorino cheese
  • White pepper
  • Pork belly
  • Extra virgin olive oil
  • Garlic
  • Basil
  • Pine nuts

Instructions

  1. Cook the penne pasta according to the instructions on the packaging.
  2. Allow the penne pasta to cool in the refrigerator, so it develops resistant starch.
  3. In a food processor blend the garlic, salt, and olive oil and then slowly add the pine nuts, basil leaves, and pecorino cheese until it forms a smooth sauce.
  4. The pesto may benefit from some red wine vinegar to prevent the basil leaves from discolouring and turning black.
  5. The pesto will keep well in the refrigerator.
  6. Dry a manageable length of your pork belly strip by rubbing it vigorously with both hands with some paper towel. You can then oil your hands and rub your pork. Cook your piece of pork in an oven at 200 °C for 40 minutes, so the rind is crispy.
  7. Cut the cooked pork belly into cubes.
  8. In a saucier pan, melt some butter on a low heat and then whisk in an equal quantity of plain flour and cook for at least 3 minutes.
  9. Add cold milk to the roux and add enough to avoid the white sauce from clumping. You don’t want globby bits in your special white sauce.
  10. Start adding the swiss and pecorino cheeses in small amounts and stir through to create a thickened luscious sauce.
  11. Season the white sauce with white pepper. Your white sauce will taste better with a little spice in it. Spicy sauces are always better in your mouth.
  12. Add in the cold penne pasta, stir through, cook until the sauce penetrates deeply, and fills the hollow tubes of goodness.
  13. Transfer the pasta dropping in your special sauce to a baking sheet and top with a little more cheesy goodness. With a Microplane take your seed of nutmeg and generously grate it over the cheese augmented “mac and cheese”. 
  14. When the pork belly has finished cooking, remove your hot pork strip and insert your “mac and cheese” until the cheese bubbles and turns a lovely golden brown.
  15. After the “mac and cheese” has finished in the oven, remove it and allow it to rest for a few minutes until it stops wobbling when you give it a poke. The growing tumescence of your “mac and cheese” means your cheese has started to set and it will be easier to handle rather than being a floppy mess.
  16. With a large spoon, dissect and withdraw a good portion of “mac and cheese” and transfer to a plate. Add some pork belly and a spoonful of pesto. Garnish with the cherry tomatoes for the contrasting colour.

Final thoughts on mac and cheese

I’ve ordered some food-grade sodium citrate on-line and will see if it helps make the cheesy white sauce any better.

According to Guga, the sodium citrate makes the cheesy white sauce smoother.

Prawn roll

Prawn roll

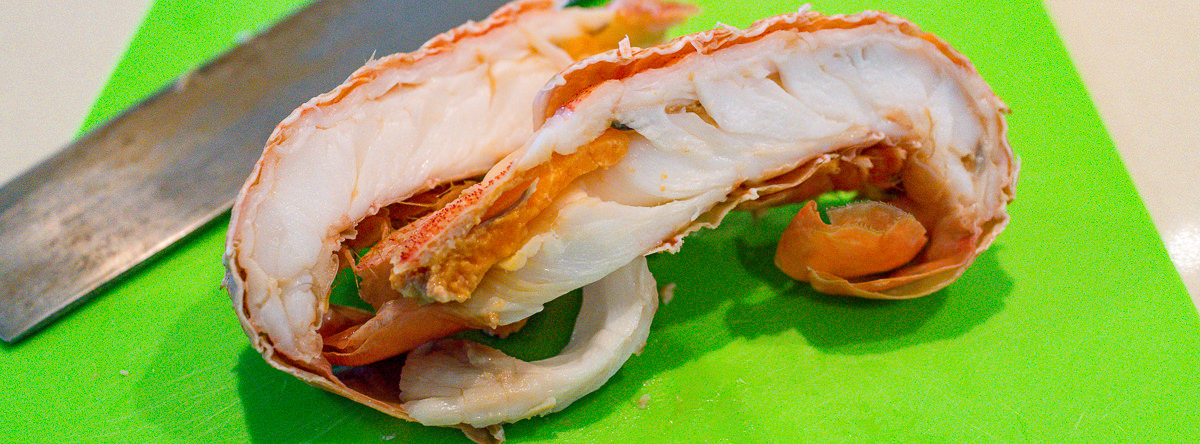
I had my heart set on a bug roll, that is, a Moreton Bay bug (slipper lobster) roll. I got to the seafood shop this morning, and there were no bugs, no lobsters either! There were prawns though, so I bought prawns for a prawn roll.

Prawn roll with wasabi mayonnaise, pickled jalapeño peppers, red chilli, and parsley served with a side salad of lettuce, cucumber, and cherry tomatoes.

The motivation for this was again Lorraine Elliott who is better known as Not Quite Nigella. This week, Lorraine wrote about lobster rolls

Ingredients

  • Prawns (cooked and peeled)
  • Mayonnaise (I used Kewpie wasabi flavoured mayonnaise)
  • Pickled jalapeño peppers (chopped)
  • Red chilli (diced)
  • Bread roll (I bought a crusty baguette)
  • Butter (Lurpak spreadable)
  • Iodised salt
  • White pepper
  • Parsley (chopped)

Instructions

  1. In a bowl add some mayonnaise, the chopped jalapeño peppers, and chopped chilli. Mix with a fork and then season with salt and pepper to taste.
  2. Fold some chopped parsley into the spicy mayonnaise.
  3. Roughly cross-section cut the prawns and fold the prawn meat to the mayonnaise.
  4. Make a midline longitudinal incision along the baguette’s ventral surface and spread the two flaps apart with your thumbs to open the incision.
  5. Spread a nudge of butter on the incision surfaces of the baguette.
  6. Spread a little butter on the outside of the baguette.
  7. Toast the lateral surfaces of the baguette in a sandwich press.
  8. If you’ve added too much butter to the incision surfaces, some melted butter will bleed from the incision. The question I have for you though is, is there such a thing as too much butter?
  9. Once the baguette’s outer lateral surfaces are toasted, remove it and gently open the incision and spoon the prawns coated in spicy mayonnaise into the baguette’s buttery incision.
  10. Serve the prawn roll with a side salad of shredded lettuce, sliced cucumber, and halved cherry tomatoes.

Final thoughts

I am a little disappointed I couldn’t get a Moreton Bay bug today; however, the prawns were a reasonable substitute.

The spicy mayonnaise complemented the prawns nicely, and the warm buttery baguette provided great contrasting mouthfeel. As far as rolls go, this prawn roll was pretty good.

What would you prefer? Lobster? Bug? Prawns?

Postscript

After chopping and dicing the pickled jalapeño peppers and chilli, I had to attend the water closet.

Without going into any inappropriate detail, I will be buying disposable gloves to wear on my hands for when I chop and dice pickled jalapeño peppers and chilli. This experience took the shine off, enjoying eating the prawn roll.